I’m working on a project that requires large un-polarized capacitors. Ceramic are perfect for the task, but the largest available seems to be around 10 micro Farads. I need between .001 to .002 Farad. That is around 200 of those wired together in parallel.
I had at first envisioned a square hole in a thick sheet of aluminum just the right size to hold 100 surface mount capacitors in a square array that could then have solder applied to connect all the end caps. I’m really glad I didn’t do that. If only one in 100 capacitors are bad, as in shorted, then the whole bank of 100 fails. I discovered what a disaster this would have been when I started putting 10 at a time together. About one in 5 or 6 attempts created .23 ohm resistors.
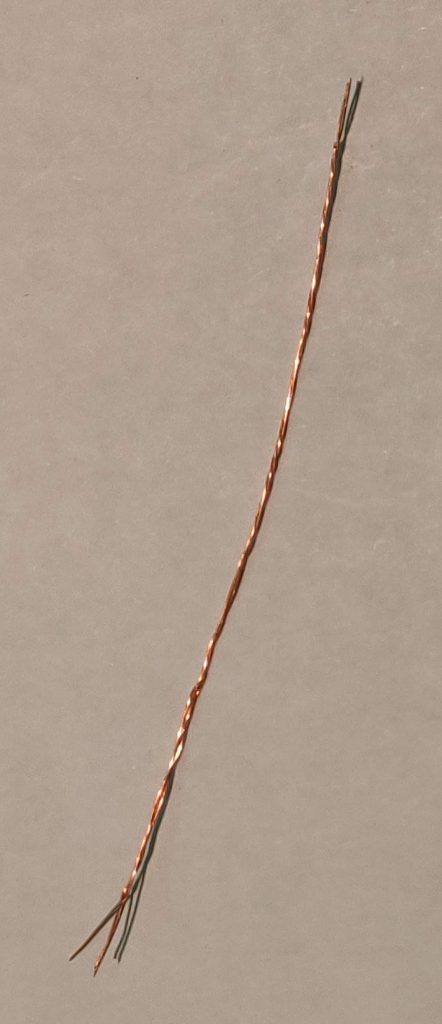
This construction technique requires precision and a steady hand. I have managed the process anyway, having neither of those skills. I learned to use both hands to steady and got more precise with time. I started out using a single strand of seven strand braided hookup wire as the edge connector on each side of the row of capacitors. That turned out to not be strong enough. The single wire would break at the worst possible place. So I tried the whole wire, and that was to thick to work after they are created. I’ve currently settled on three strands of this hookup wire twisted together, creating just the right size wire for the job.
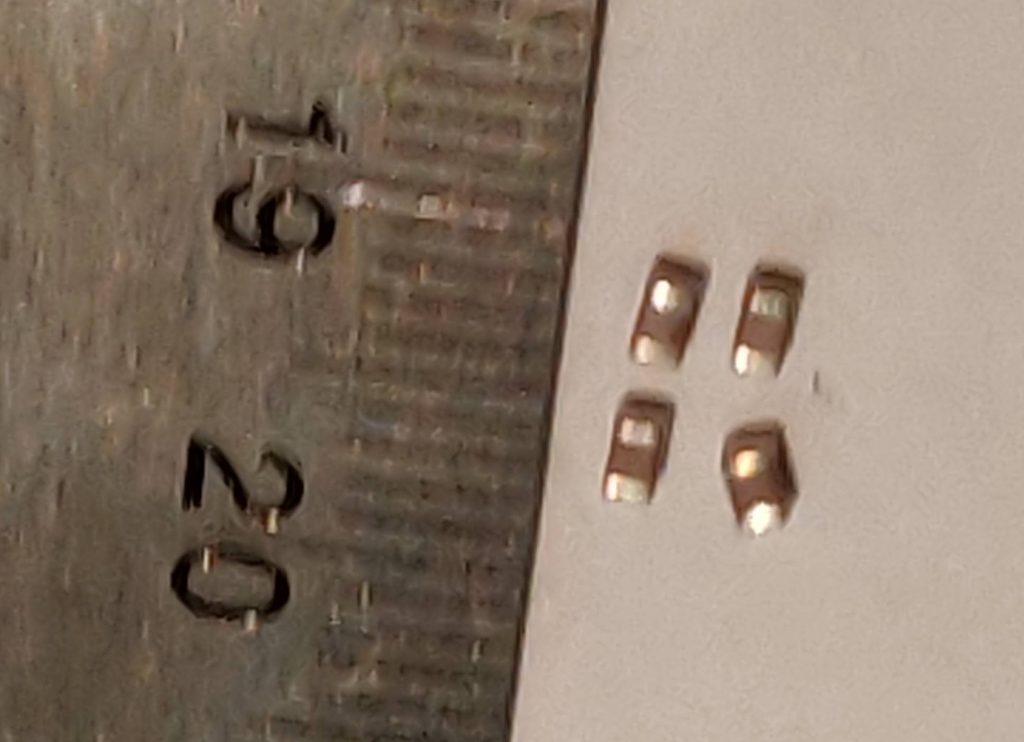
These capacitors are about 3 mm long, or in common language really small!
The first step is to make the wires. Start with three strands about 3 inches long.
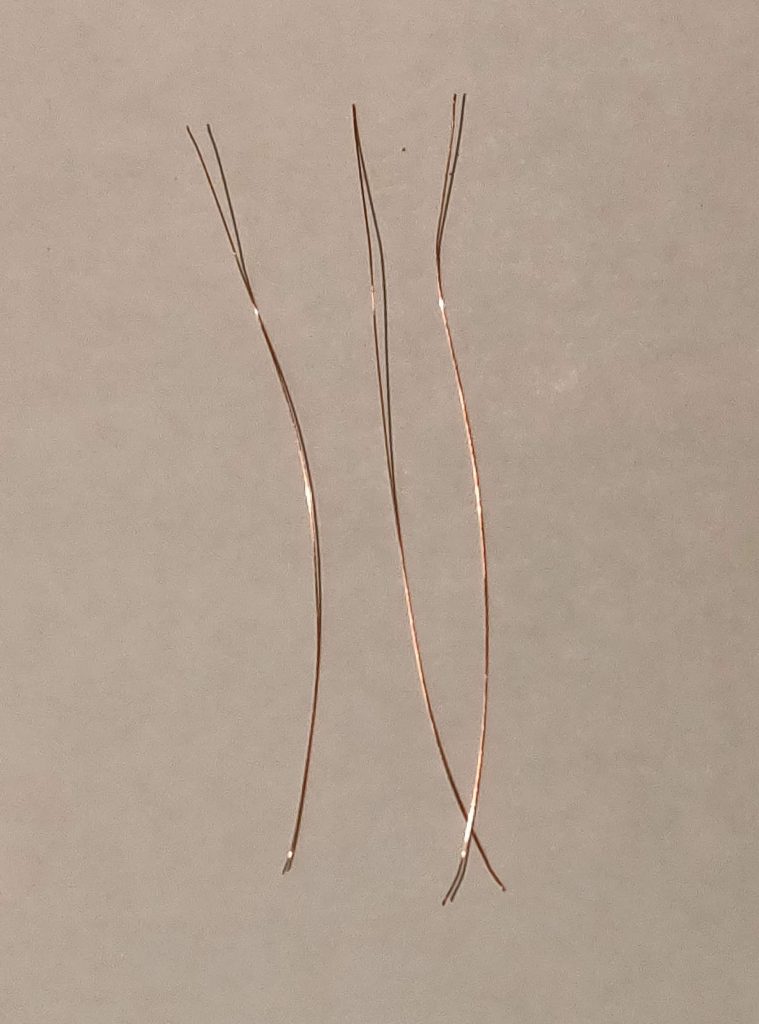
Twist them together to make a single strand of wire, keeping the ends of the wire relatively untwisted. This will act as the anchor point when mounting begins.
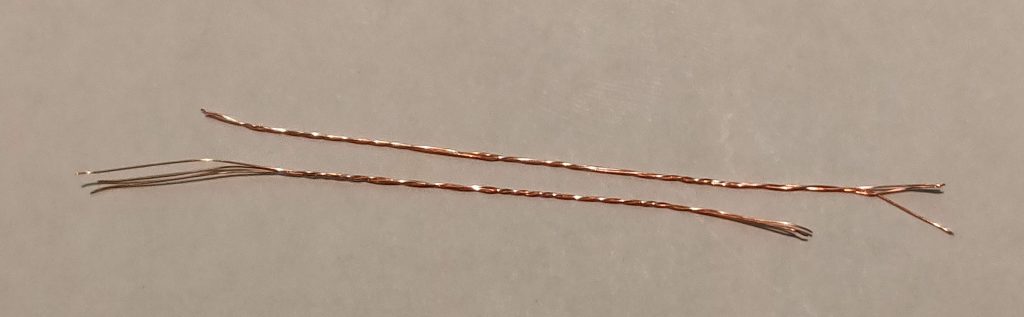
You will need to make two of these for every assembly.
Now you need a bit to ceramic tile to lay out the parts. You will also need some ceramic clay slightly moistened to use to hold down the end of the wires. Using the clay to hold down the end of the wires looks like this:
Here are the two wires laid down on the tile and help in place by clay. It is important to get the spacing right and parallel at least for the length needed.
So, I’m looking to get 100 micro Farad, but the 10% value error always leans toward the less than. So, to make sure I get 100 micro farad, I place 11 capacitors between the wire.
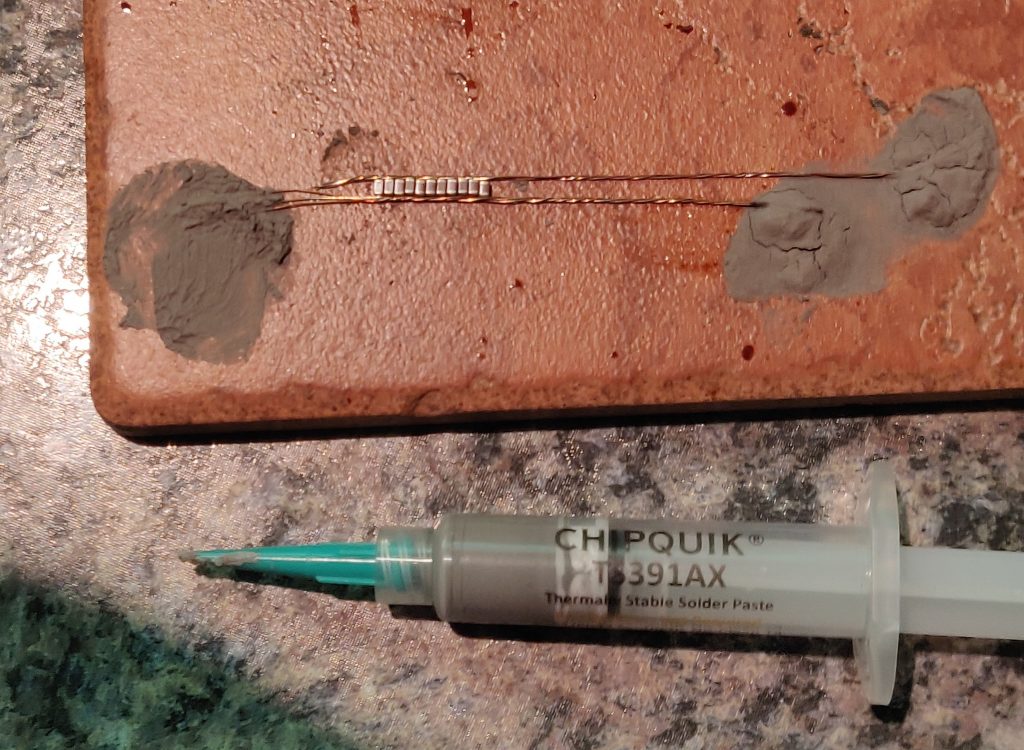
The solder is applied with the syringe along the wire edge. It flows under the wire under pressure and don’t make it wider than the wire. Place the tile on the main rack of your toaster oven. Set it to bake at 400 decrees for about 8 minutes. It should look a bit like this:
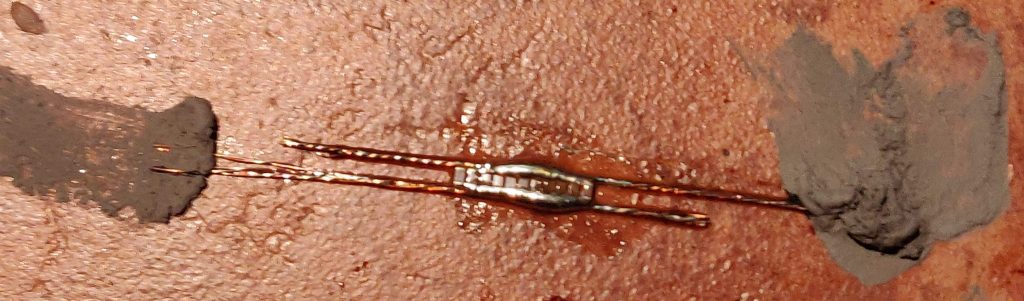
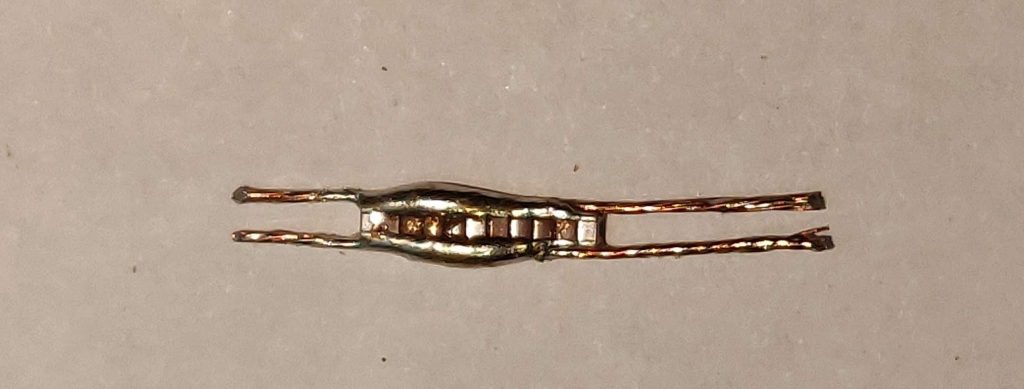
I use a thin knife and slide it under the wires and cut the clay loose. Once you have pealed the part off the tile, and cleaned up the wire and cutting them square the part looks like this.
Make nine more of these and wire them together in parallel to get a .1 Farad capacitor.